Coastal Photography_ 3 Tips for Capturing Stunning Landscapes
Explore the art of capturing stunning coastal landscapes with our 3 tips for coastal photography, focusing on composition, lighting, and editing techniques.
Understanding Coastal Photography Composition Techniques
Alright, let's dive into the nitty-gritty of composing a killer coastal photo. Composition is basically how you arrange elements within your frame to create a visually appealing and engaging image. Forget simply pointing and shooting; we want to tell a story!
The Rule of Thirds: A Coastal Photography Classic
You've probably heard of this one. Imagine dividing your viewfinder into a 3x3 grid. Place your key elements – the horizon, a striking rock formation, a lone surfer – along these lines or at their intersections. This creates a more balanced and dynamic composition than simply centering everything.
Example: Imagine a sunset shot. Instead of placing the horizon dead center, position it along the top or bottom third of the frame. This emphasizes either the sky's vibrant colors or the details of the foreground beach.
Leading Lines: Guiding the Viewer's Eye in Coastal Photos
Leading lines are visual pathways that draw the viewer's eye into the scene. Think of a winding path, a pier stretching into the ocean, or even a line of breaking waves. These lines create depth and guide the viewer's attention to the focal point.
Example: Capture a photograph of a wooden pier with the planks leading into the distance. The pier acts as a leading line, drawing the viewer's eye towards the horizon and the vastness of the ocean.
Framing: Adding Depth and Focus to Coastal Scenes
Framing involves using elements within the scene to create a natural frame around your subject. This could be an archway, overhanging branches, or even a gap between rocks. Framing adds depth, isolates the subject, and draws attention to what's important.
Example: Find a natural archway in a coastal rock formation. Position yourself so that the archway frames a distant lighthouse or a breathtaking sunset. The archway acts as a frame, highlighting the focal point and adding depth to the image.
Mastering Coastal Photography Lighting Conditions
Lighting is everything in photography, and coastal environments offer a wide range of lighting challenges and opportunities. Understanding how to work with different light conditions is crucial for capturing stunning coastal images.
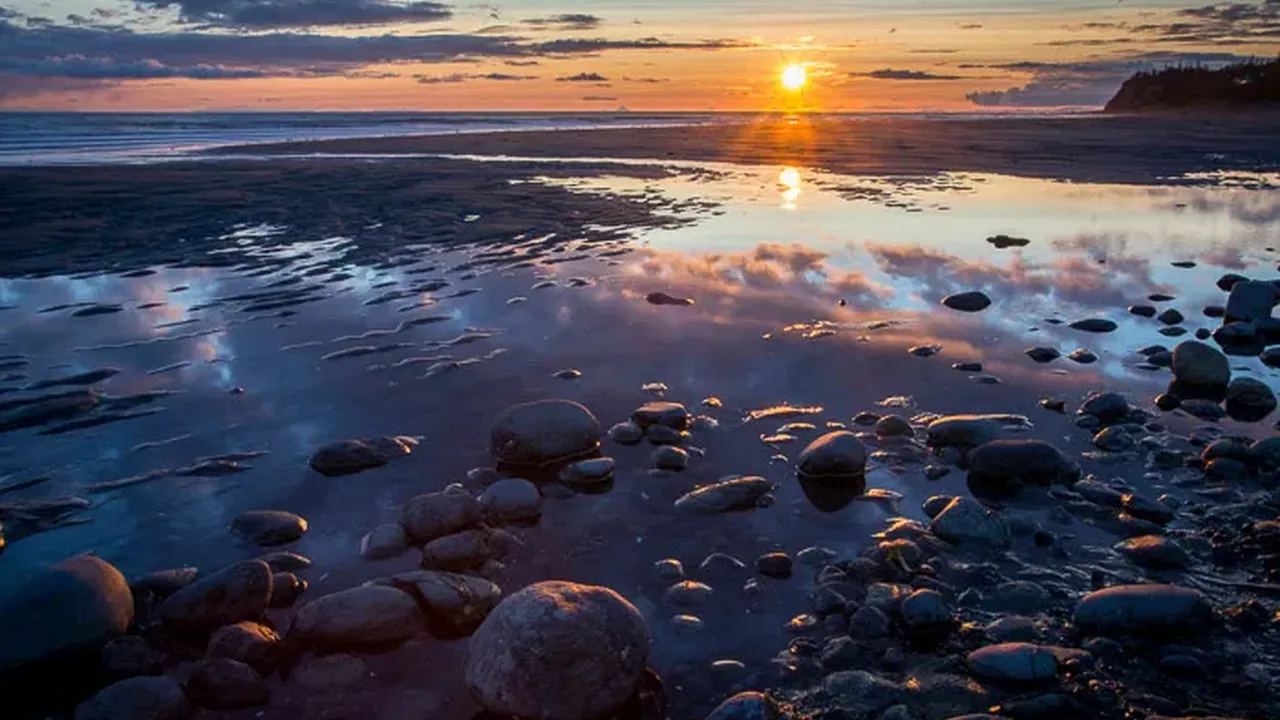
Golden Hour: The Coastal Photographer's Best Friend
The golden hour, the hour after sunrise and the hour before sunset, is a photographer's dream. During this time, the light is soft, warm, and diffused, creating a magical glow that enhances colors and textures. Shadows are long and dramatic, adding depth and dimension to your coastal scenes.
Example: Arrive at the beach an hour before sunset. Position yourself to capture the warm golden light reflecting off the water and illuminating the sand. Use a wide aperture to create a shallow depth of field, blurring the background and emphasizing your subject.
Overcast Days: Embracing Soft, Even Lighting for Coastal Shots
Don't despair if it's overcast! Overcast days provide soft, even lighting that eliminates harsh shadows and highlights. This is ideal for capturing details and textures, especially in landscapes and close-up shots. Overcast light also enhances colors, making them appear more vibrant.
Example: Take advantage of an overcast day to photograph tide pools filled with colorful sea creatures. The soft, even light will bring out the details and colors of the marine life without creating harsh shadows.
Dealing with Harsh Sunlight: Coastal Photography Challenges and Solutions
Shooting in harsh sunlight can be tricky, as it creates strong shadows and blown-out highlights. However, there are ways to mitigate these effects. Use a polarizing filter to reduce glare and reflections, or try shooting in the shade. You can also use fill flash to brighten up shadows.
Example: If you must shoot in direct sunlight, try positioning your subject with their back to the sun. Use a reflector to bounce light back onto their face, filling in the shadows and creating a more balanced exposure. Alternatively, find a shaded area, such as under a pier or a large rock formation.
Coastal Photography Editing Techniques and Software
Post-processing is an essential part of the digital photography workflow. Editing software like Adobe Lightroom or Capture One allows you to enhance your images, correct imperfections, and achieve your desired look. Let's explore some key editing techniques for coastal photography.
Basic Adjustments: Exposure, Contrast, and White Balance for Coastal Photos
Start with the basics. Adjust the exposure to brighten or darken the image, depending on the lighting conditions. Increase the contrast to add depth and dimension, and adjust the white balance to correct any color casts. Pay attention to the histogram to ensure that you're not clipping highlights or shadows.
Software Recommendation: Adobe Lightroom is a popular choice for its user-friendly interface and powerful editing tools. The monthly subscription is around $10. Key adjustments include Exposure, Contrast, Highlights, Shadows, Whites, and Blacks.
Color Correction and Enhancement: Bringing Out Coastal Colors
Coastal scenes are often filled with vibrant colors, but sometimes these colors can appear muted in photographs. Use the color correction tools in your editing software to bring out the blues of the ocean, the greens of the vegetation, and the warm tones of the sand. Be careful not to over-saturate the colors, as this can make the image look unnatural.
Product Recommendation: Capture One is another excellent option, especially known for its superior color handling. While more expensive than Lightroom (around $300 for a perpetual license), professionals often prefer it for its precise color control. Adjustments like Hue, Saturation, and Luminance (HSL) are critical.
Comparison: Lightroom is generally easier to learn and use, making it a good choice for beginners. Capture One offers more advanced features and greater control over color, making it a favorite among professional photographers. Both offer free trials.
Sharpening and Noise Reduction: Improving Image Clarity in Coastal Settings
Sharpening can improve the clarity and detail of your images, but it's important to use it sparingly. Over-sharpening can create unwanted artifacts and make the image look unnatural. Noise reduction can help to reduce graininess, especially in images shot at high ISO settings.
Usage Scenario: Images shot in low light or with high ISO will benefit from noise reduction. Images with fine details, like textures in rocks or waves, will benefit from sharpening.
Software Feature: Both Lightroom and Capture One offer effective sharpening and noise reduction tools. Experiment with the settings to find the right balance for your image.
:max_bytes(150000):strip_icc()/277019-baked-pork-chops-with-cream-of-mushroom-soup-DDMFS-beauty-4x3-BG-7505-5762b731cf30447d9cbbbbbf387beafa.jpg)